Intro to UE5 Editor Utility Widgets
Efficient workflows are very important in game dev.
Making repetitive daunting tasks efficient or partly automated can make all the difference in the iteration process.
Editor Utility Widgets allow us to create custom editor functionality and user interfaces using UMG right within Unreal Editor, without the need of C++.
This is very powerful and enables Technical Sound Designers to come up with custom tools to improve the workflow of the team.
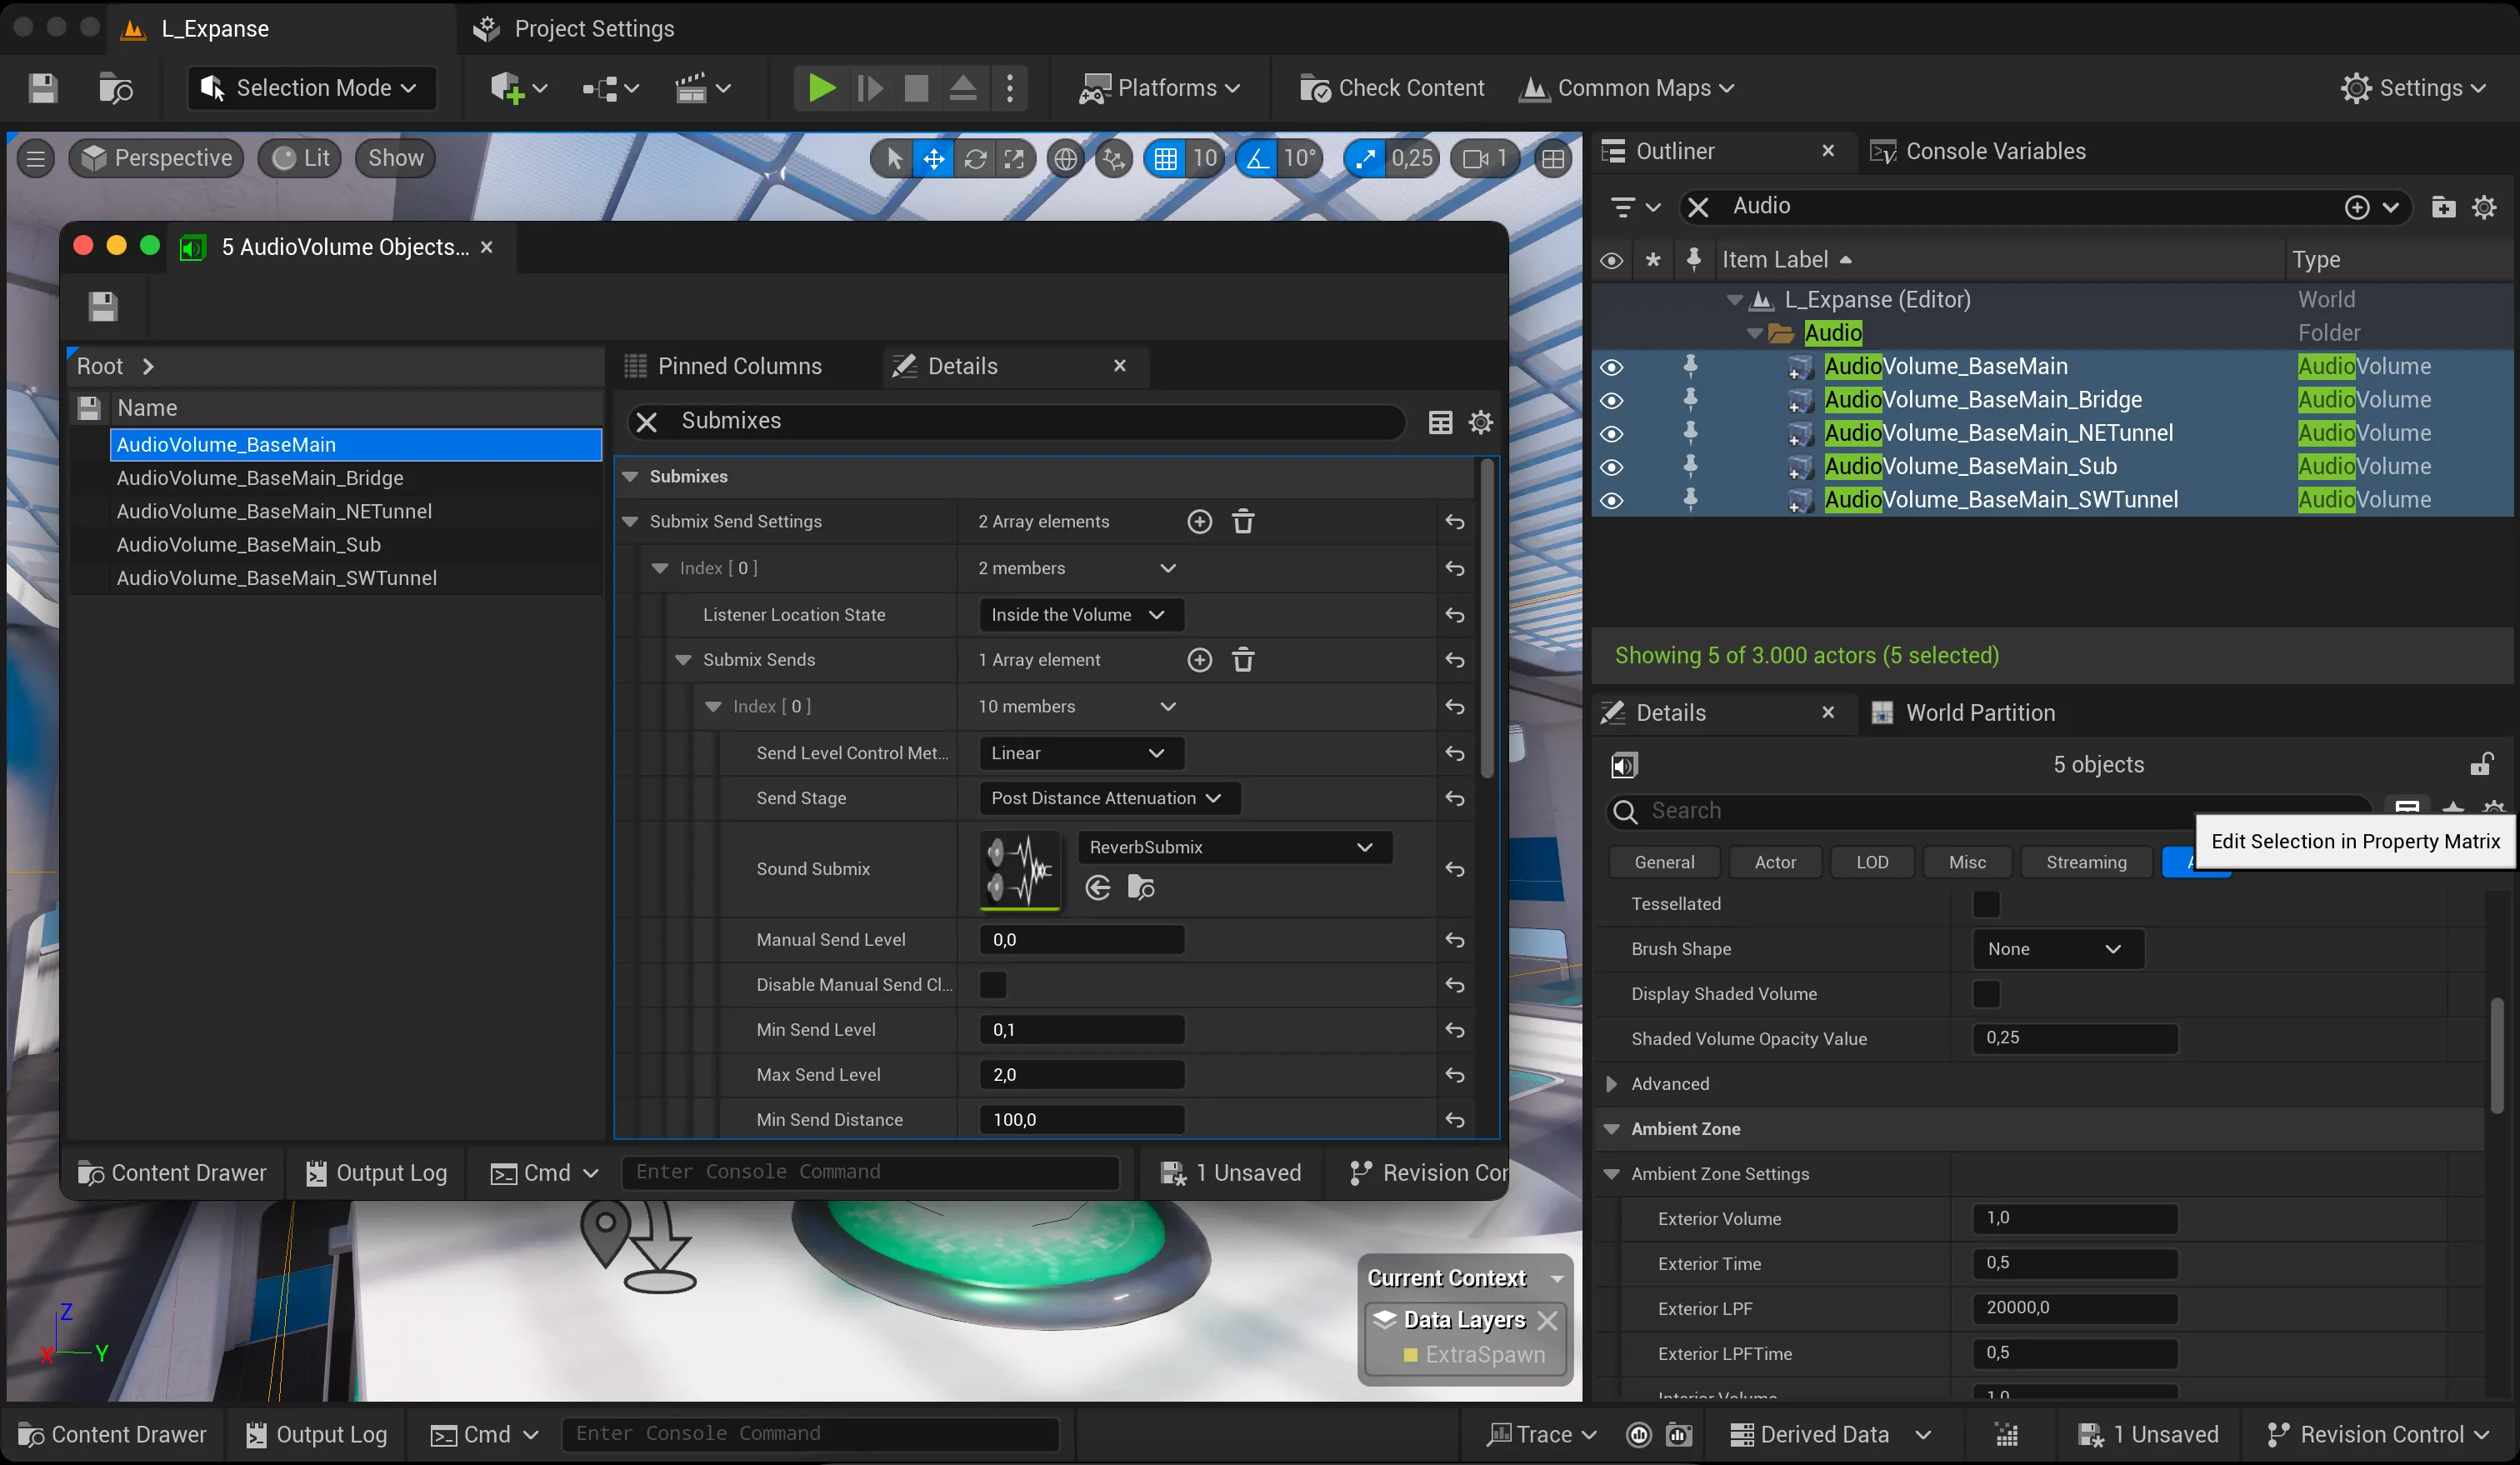
I personally often use them to bulk edit/validate audio related options on actors that are part of a larger system when working with the Outliner and Details Panel is not sufficient or daunting.
For example when you need to adjust properties of Actor Components.
Hint: Did you know you can bulk edit selected objects from the Outliner using the Property Matrix :)?
In this tutorial we’ll be using UE 5.3 and Project Lyra to implement a custom EUW from scratch.
To follow along create a new Project Lyra game first. We will be using the L_Expanse level for testing.
Note: I chose this mainly to have a practical example for you to play around with. It might not necessarily be the best use-case for a custom editor utility widget.
You can find a finished version of it on my github.
Creating a EUW from scratch
The following is the UEW we will be creating in this tutorial.

It will have the following features:
- list all
B_AbilitySpawners - expose the
Soundproperties of theirAudio Component - select and focus the viewport to a
B_AbilitySpawnerwhen clicking it’s name in the EUW
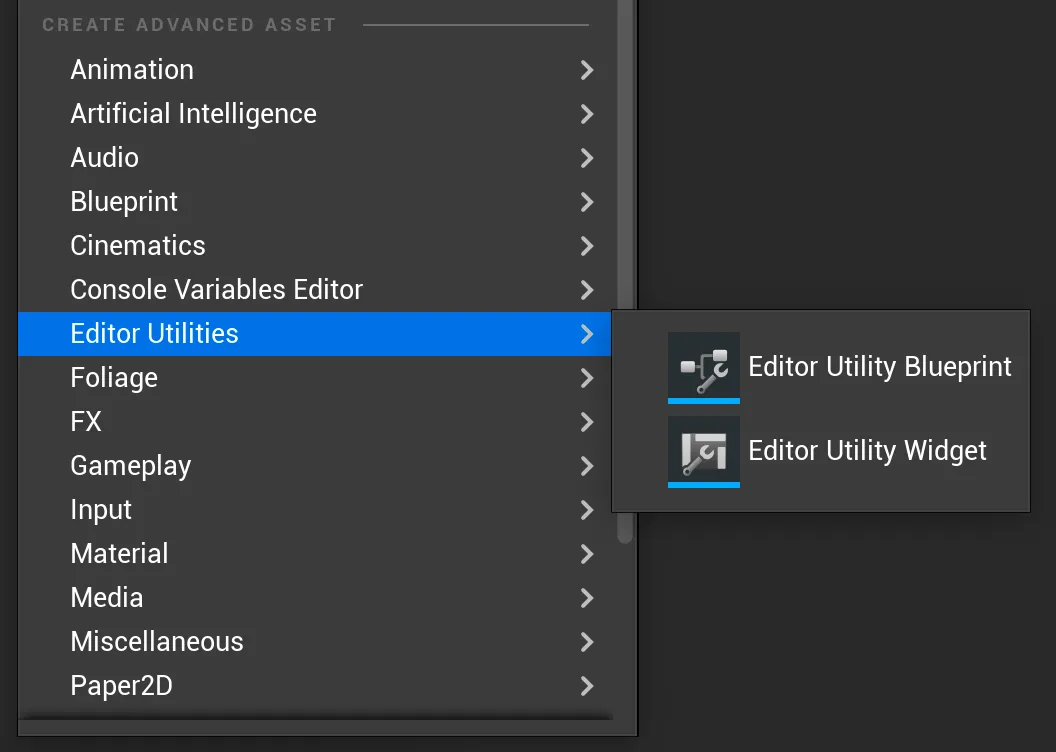
In your preferred folder in the Content Browser, create a new Asset of the type Edit Utilities/Editor Utility Widget. Let’s call it EUW_AbilitySpawnerEditor, if we’re asked for a root widget select Stack Box.
Hint: Your developer folder is usually a good place for tools.
If you’ve ever done anything with UMG this should look familiar. When opening the EUW, we’re presented with a Designer tab where we can layout the UI elements and a Graph to setup the logic.
We’ll create the following structure, setting the StackBox Orientation to Vertical and adding a Button with Horizontal Alignemnent Left and child Text, and a ListView.
I gave both the Button and the List View a padding of 8.0.
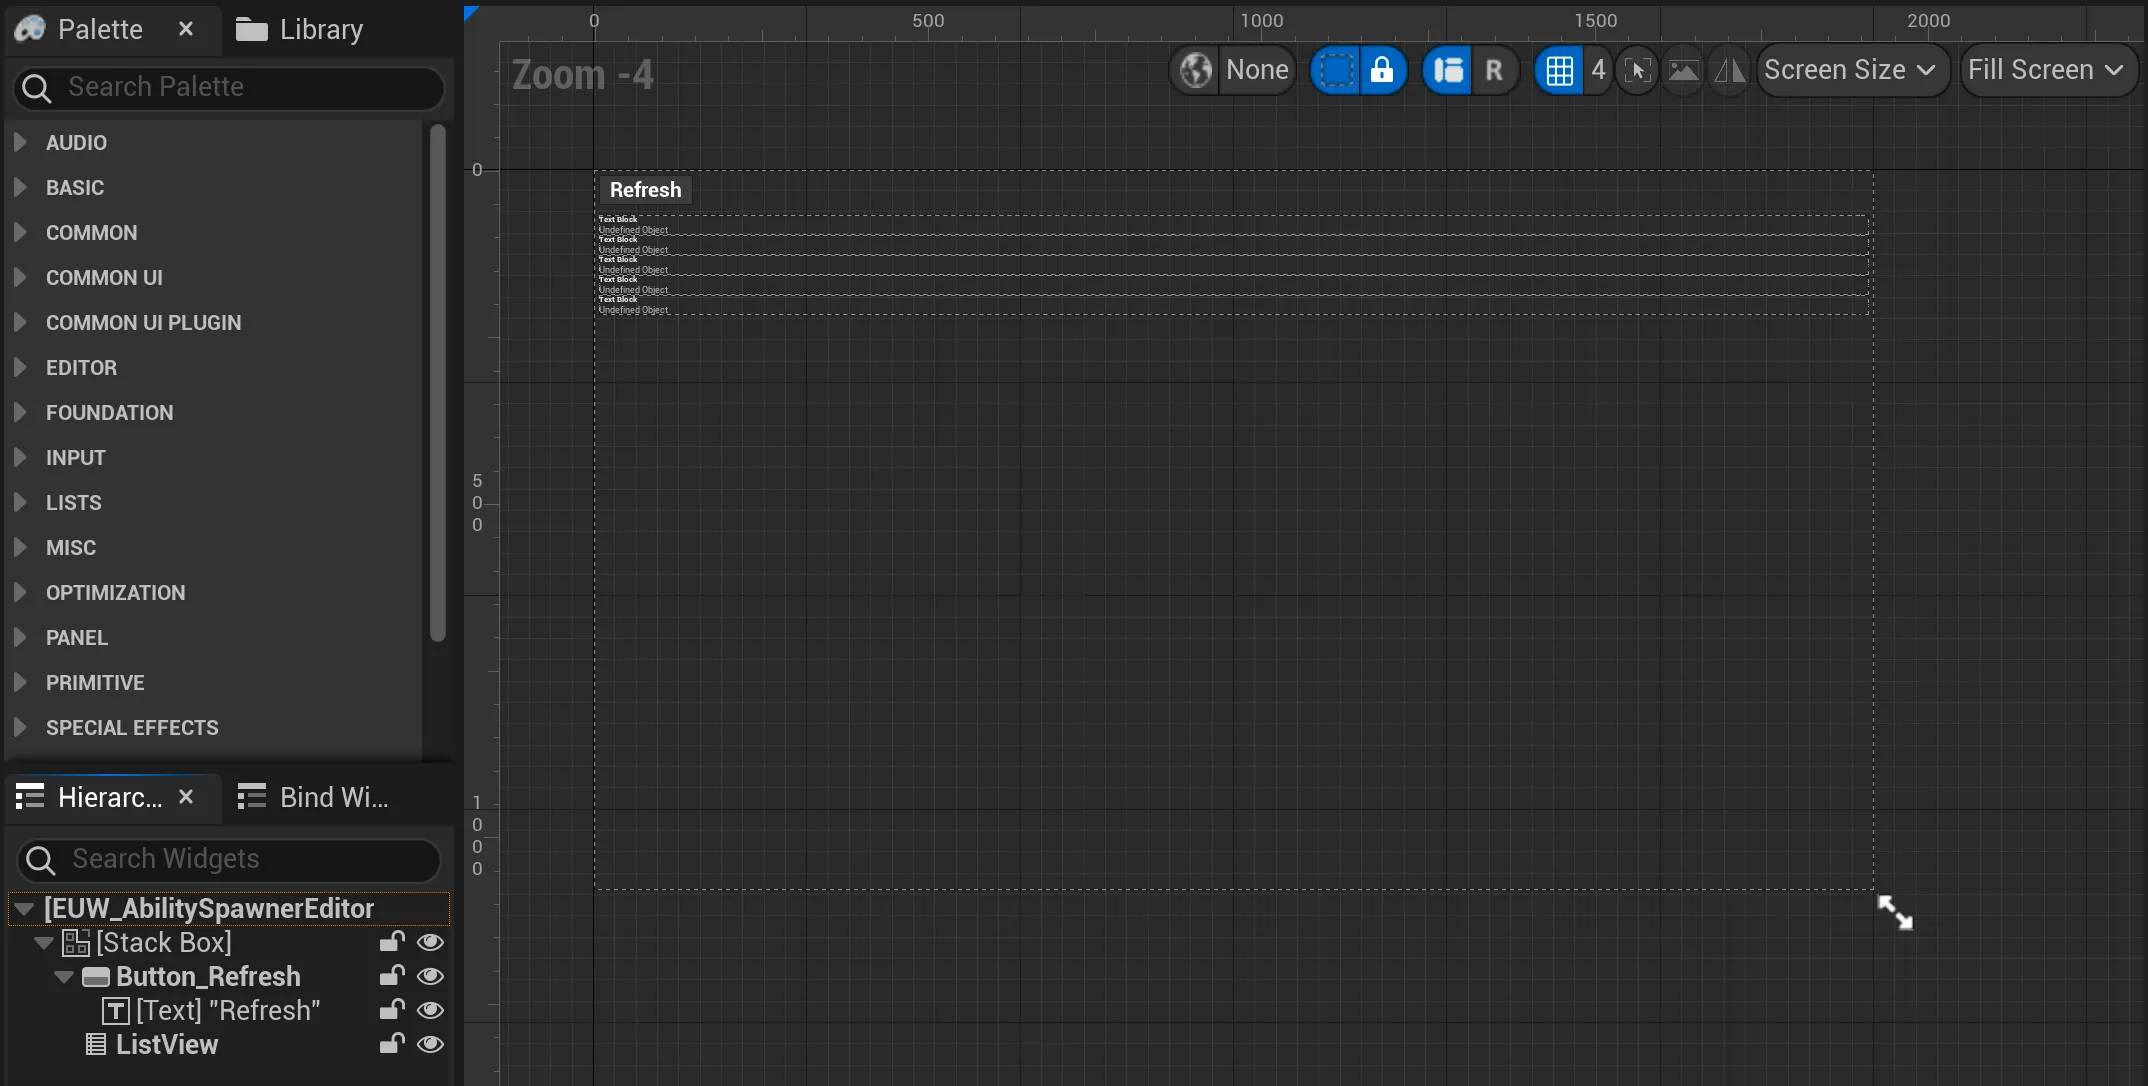
If we try to compile the EUW we will get an error because our ListView doesn’t have a EntryWidgetClass specified. Let’s change that.
Back in the Content Browser create a second Editor Utility Widget and call it EUW_AbilitySpawnerEditor_ListViewEntry. Again we choose Stack Box layout.
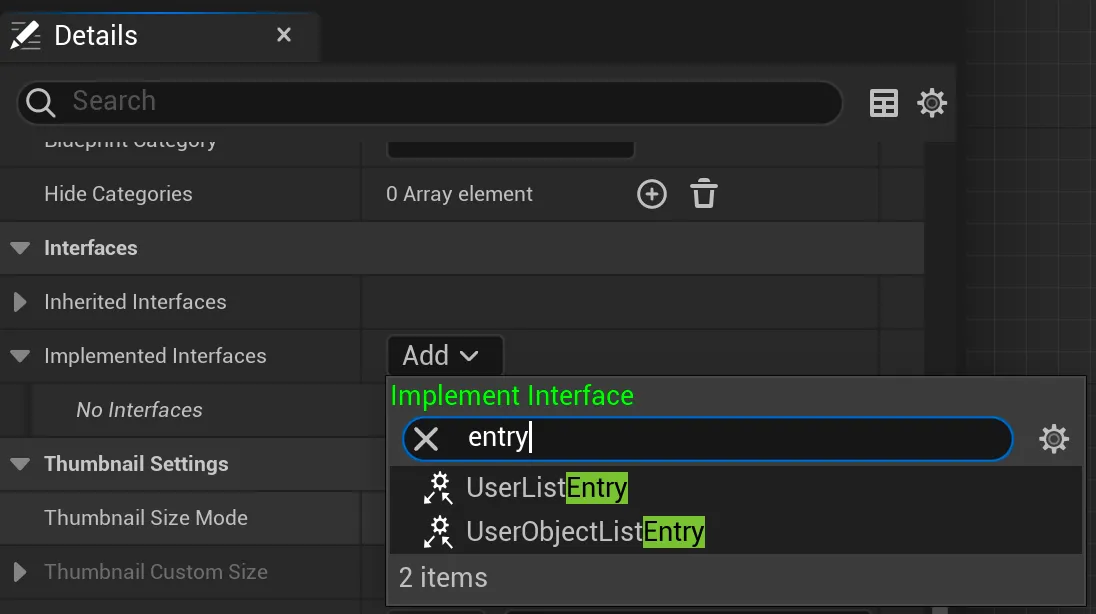
Open the WBP and the Graph, then to the Class Settings and navigate to the Interfaces section in the details. To use this WBP as a List View Entry it needs to implement the UserObjecctListEntry interface.
Back in our the first EUW we created, we can now set the Entry Widget Class property of the List view to our newly created widget.
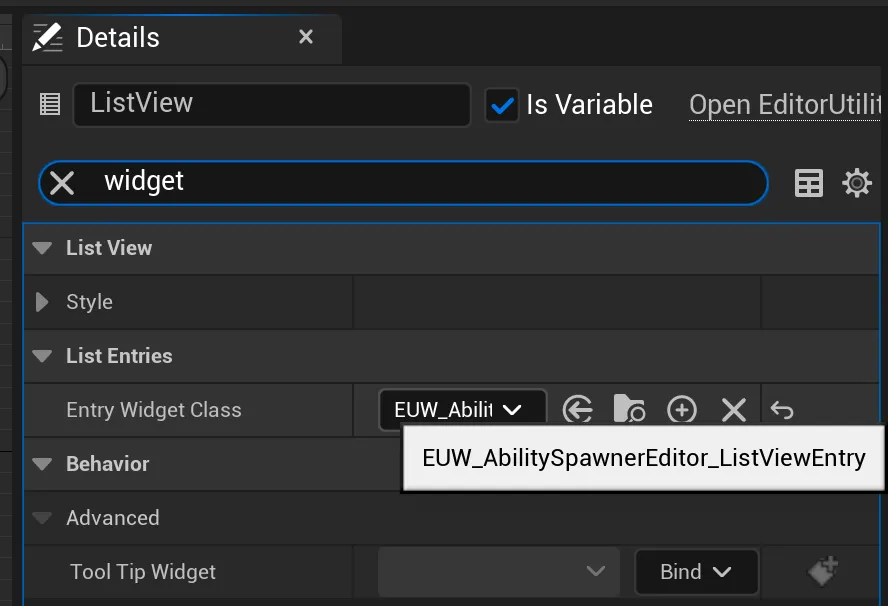
Finally our EUW should compile again.
Getting the Level Actors
In order to populate our ListView with entries we need to somehow get the Actors we want to edit from the level.
Lets select our Button in the Designer and add a On Pressed event.
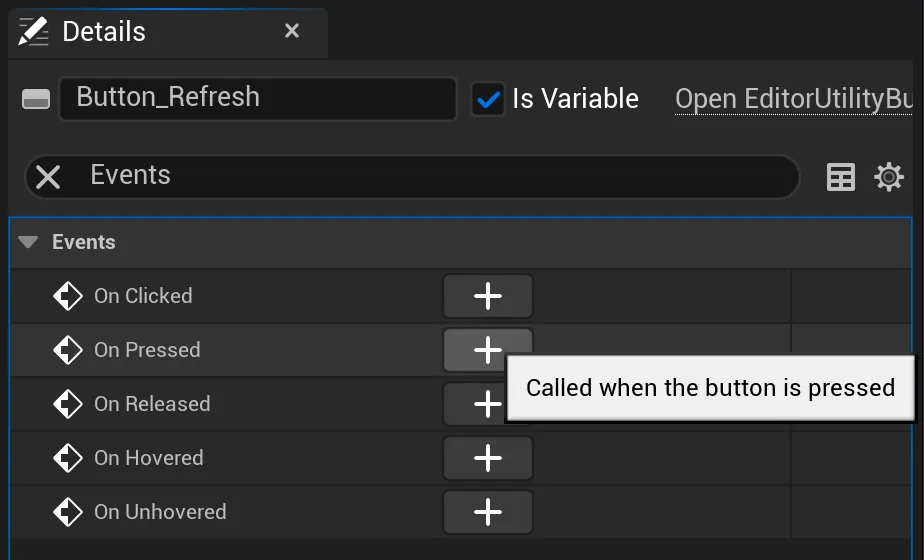
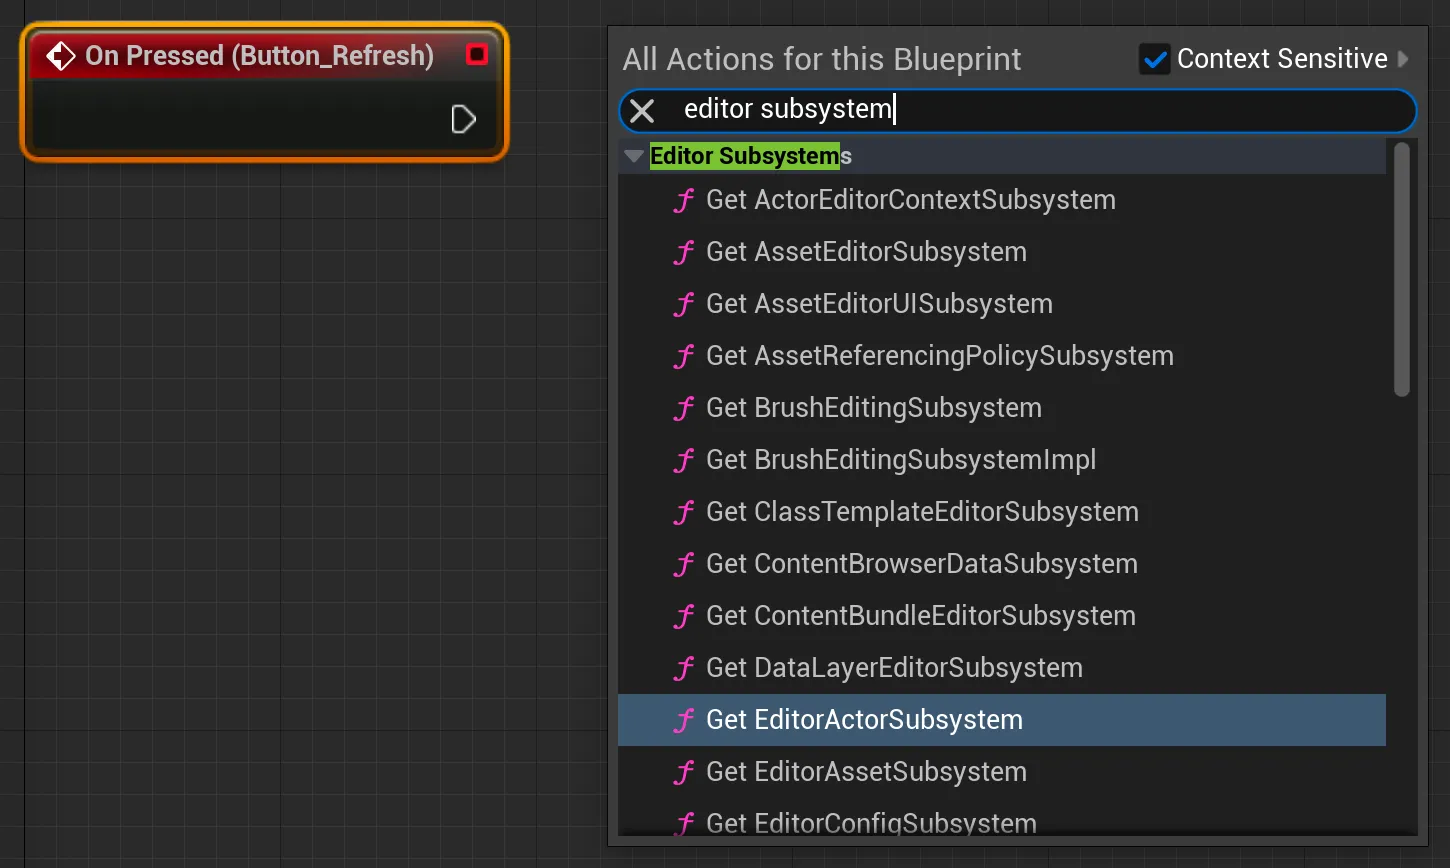
This will take as straight into the Graph view. For editor scripting, there exists a plethora of Editor Subsystems. We will be using the EditorActorSubsystem.
As the name suggests it allows us to interact with Actors in a level, which is exactly what we want.
We use this subsystem to get all actors in the level and then filter them by the class we’re interested in, which in our case is B_AbilitySpawner.
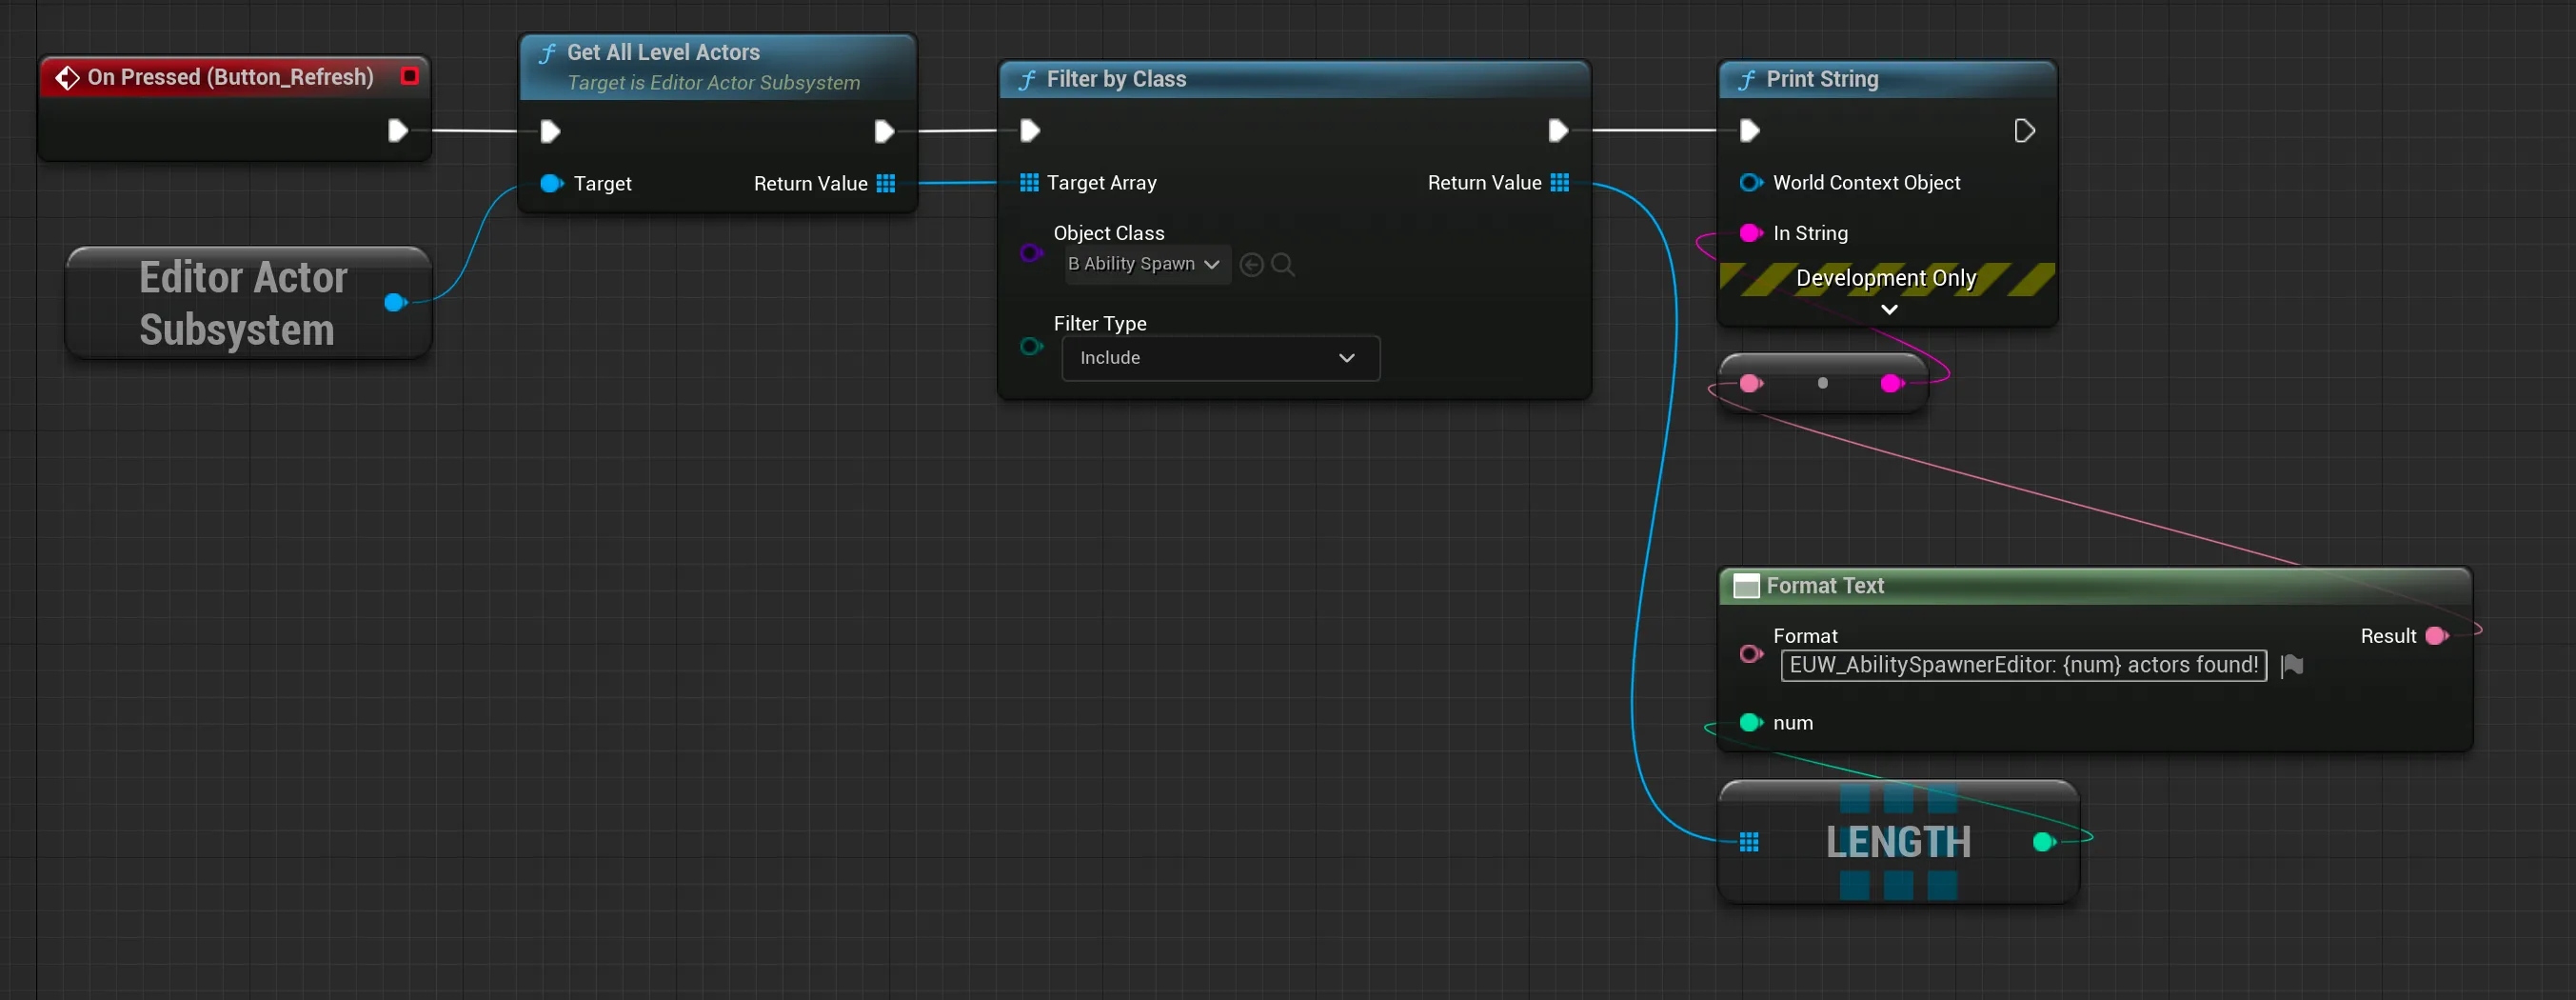
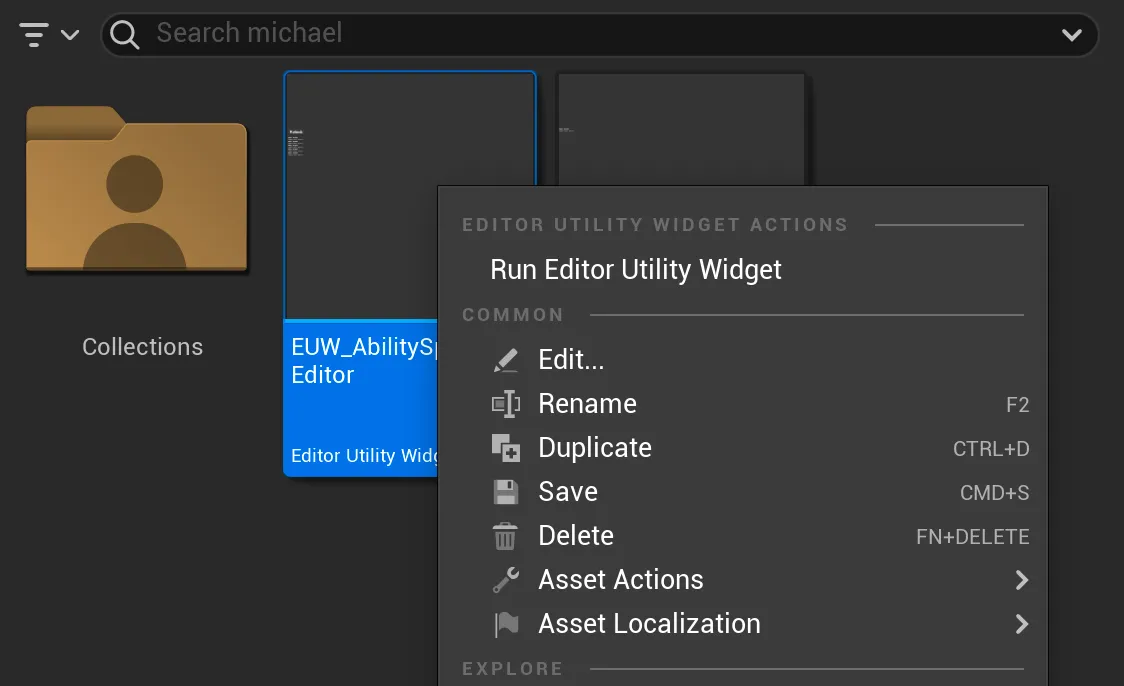
Let’s run our main widget for the first time, by right clicking on the EUW blueprint asset in the Content Browser and selecting Run Editor Widget.
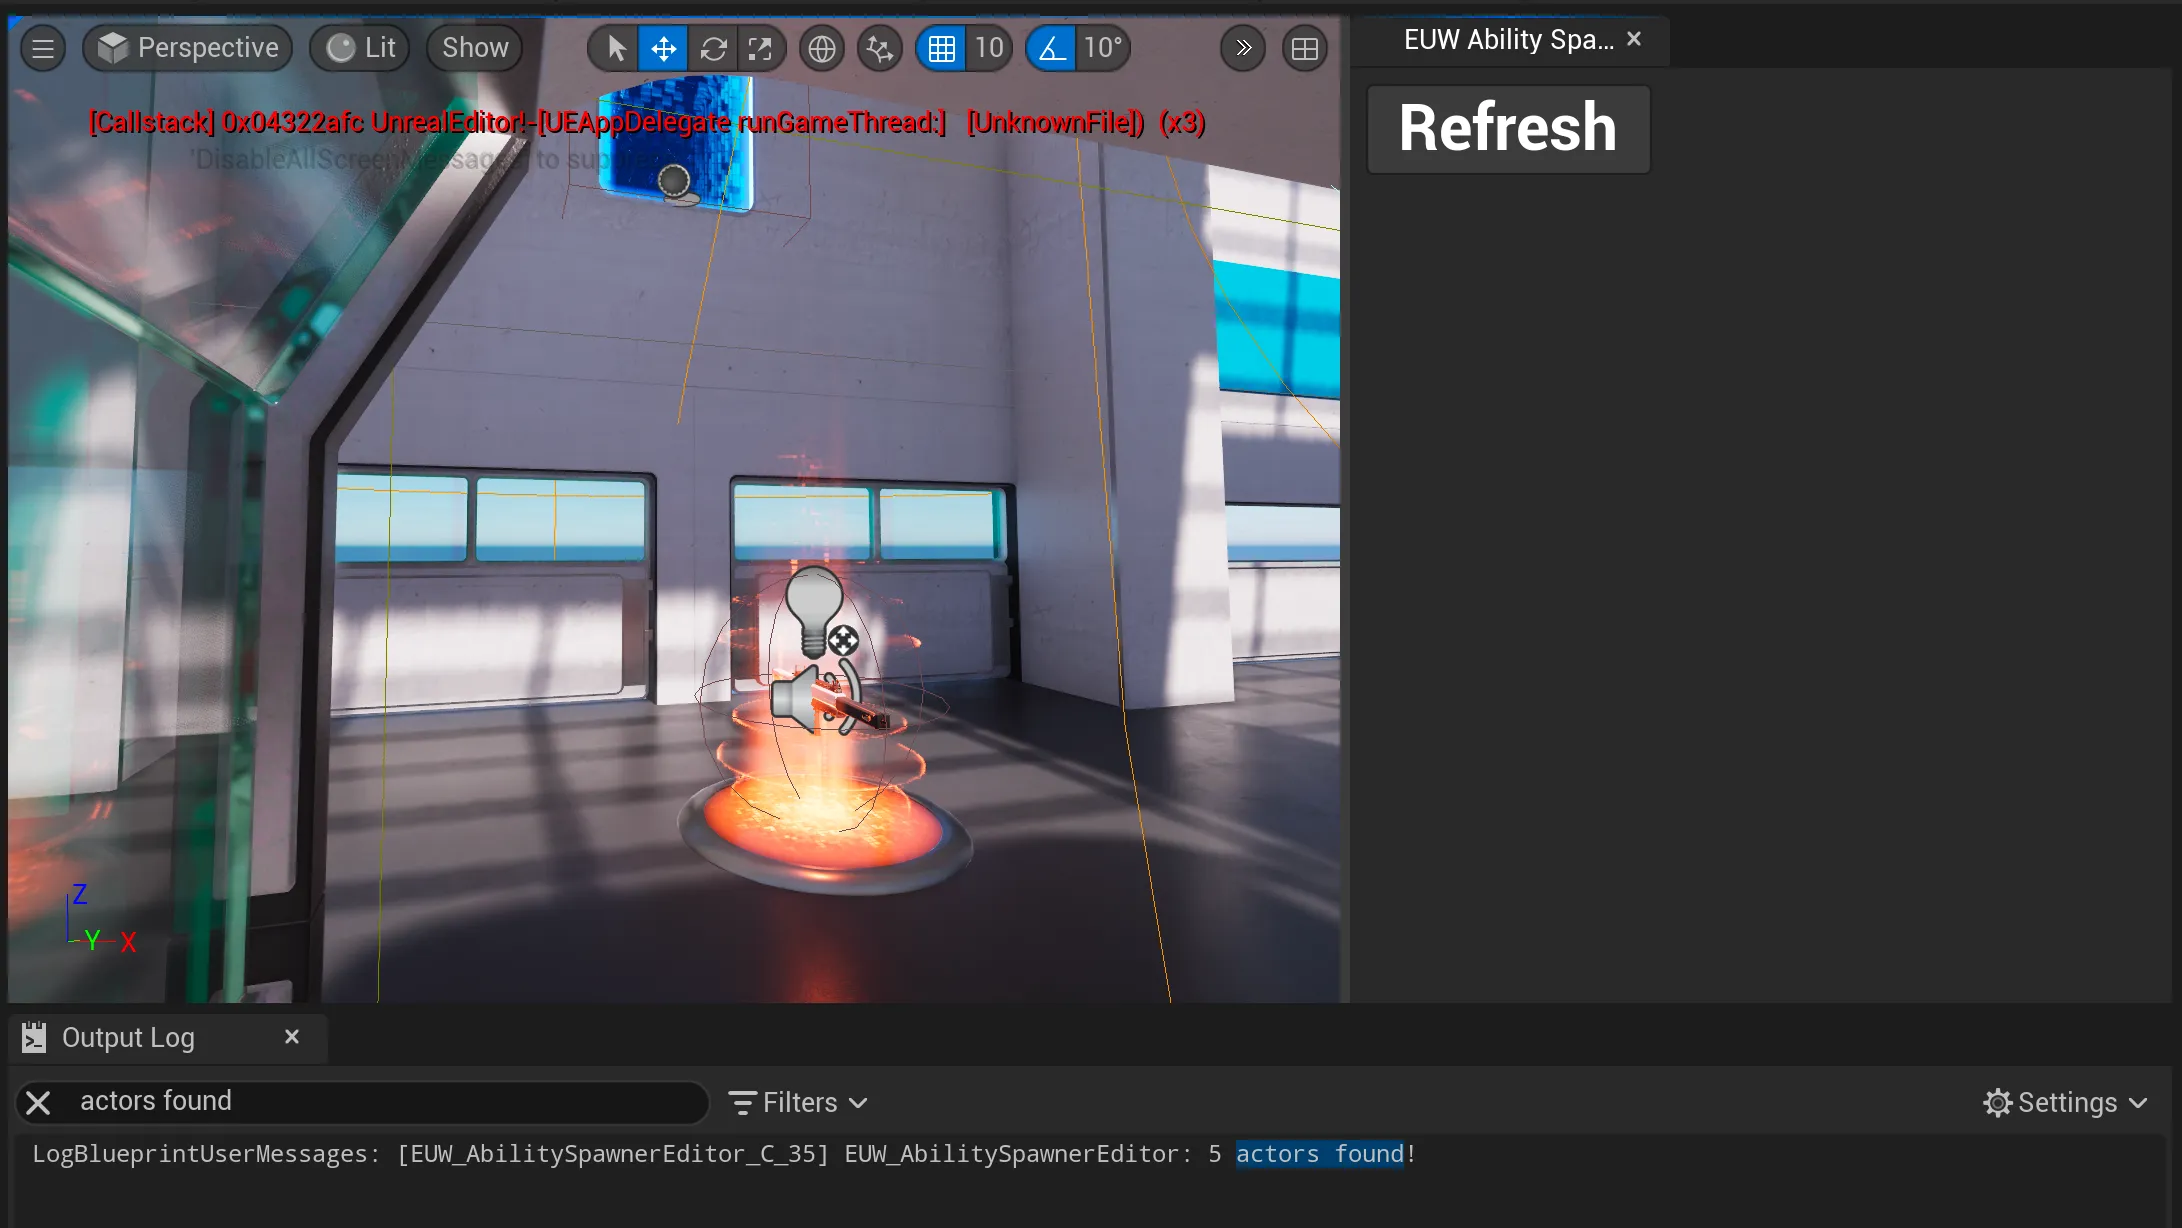
When we click the refresh button we should see the number of B_AbilitySpawners in the level printed to the Output Log.
Now that we have a way to find our the Actors, it’s time to modify our List View Entry widget.
The List View Entry
The List View Entry widget is responsible for displaying the information we want to access for each of our B_AbilitySpawners.
To display properties, we have two options, the Single Property View and the Detail View.
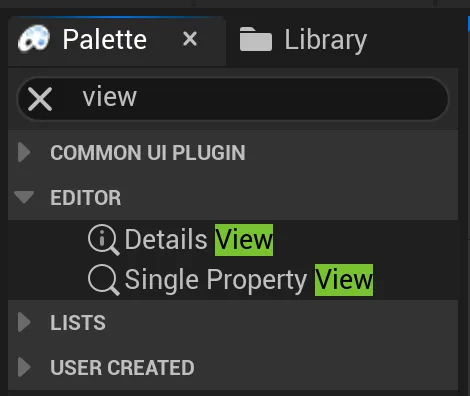
The Single Property View allows for displaying one single property, whereas the Details View allows to either display just specific categories and/or individual properties.
In the Designer we will create the following layout. A Common Text that we
will use to display the actor name and a Details View for the properties of the Ability Spawner.
.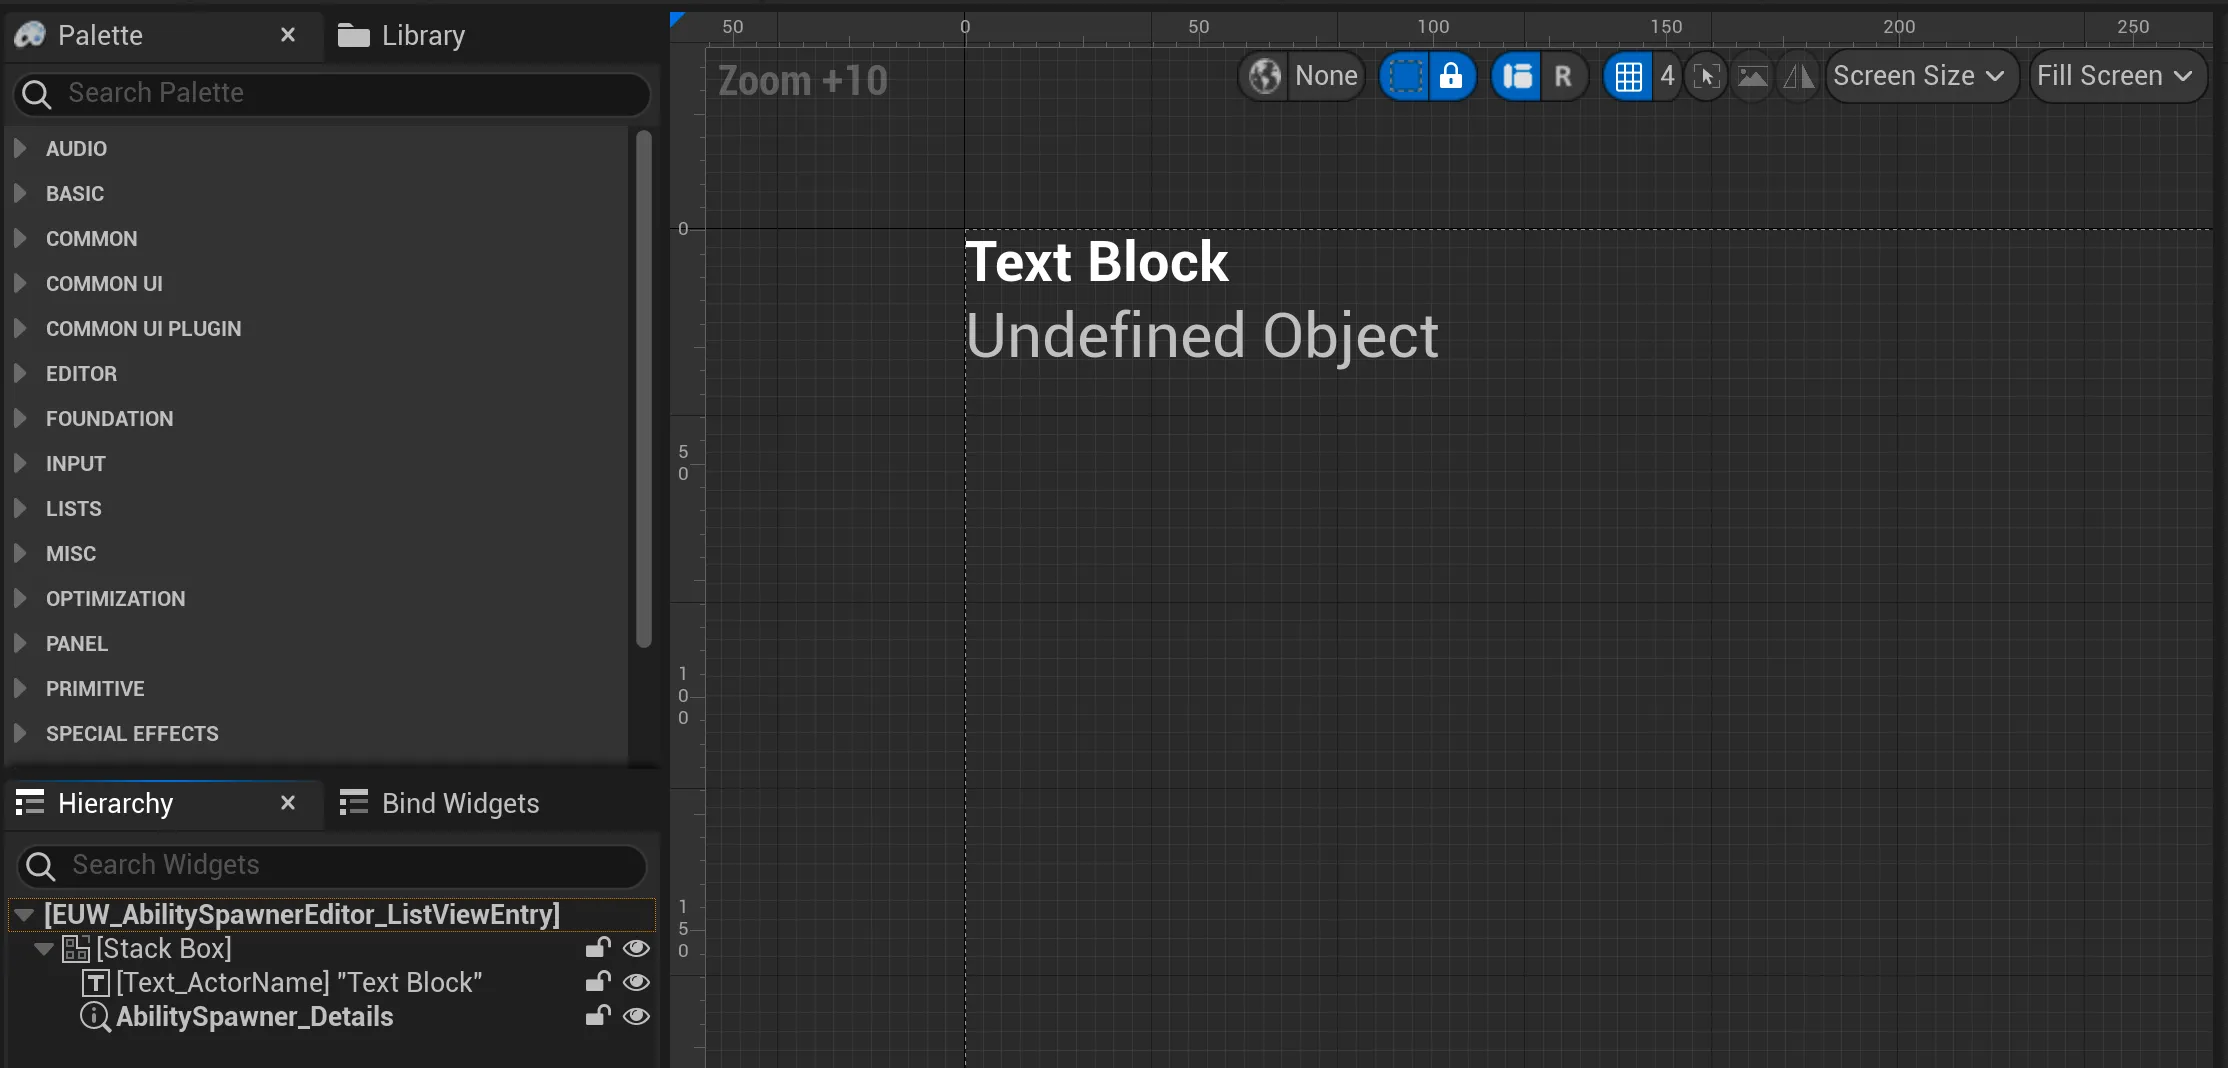
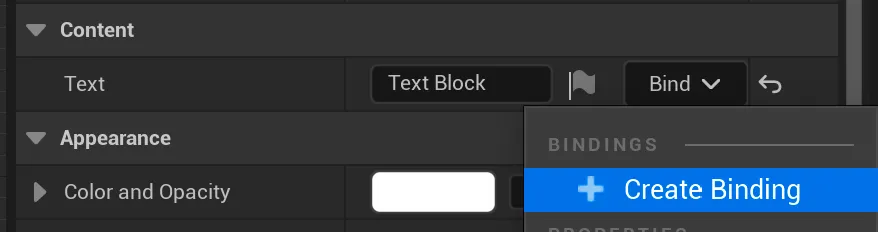
To be able to change the text of the Commmon Text we need to add a variable binding. Select the Common Text, go to the details panel and use the bind dropdown next to the Text property to create a new binding.
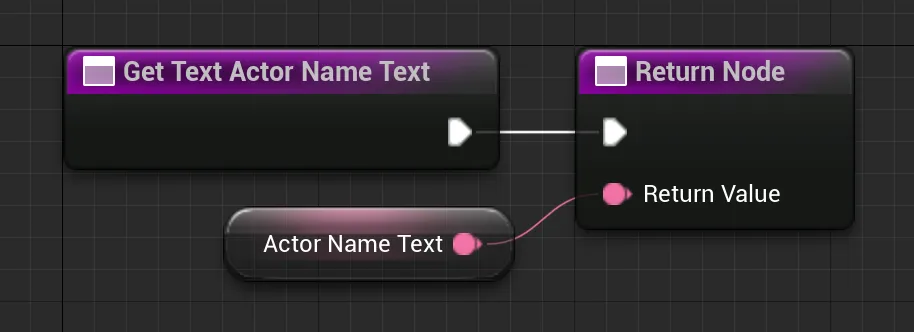
In the newly created function drag of the Return Value, select promote to variable and name it ActorNameText.
Then we implement the On List Item Object Set method provided by the Object List Entry interface we added earlier, to update the VolumeNameText variable with the DisplayName of the Volume our widget will hold.
Finally we need to go back to the 1st widget created and add the volumes to the List View.

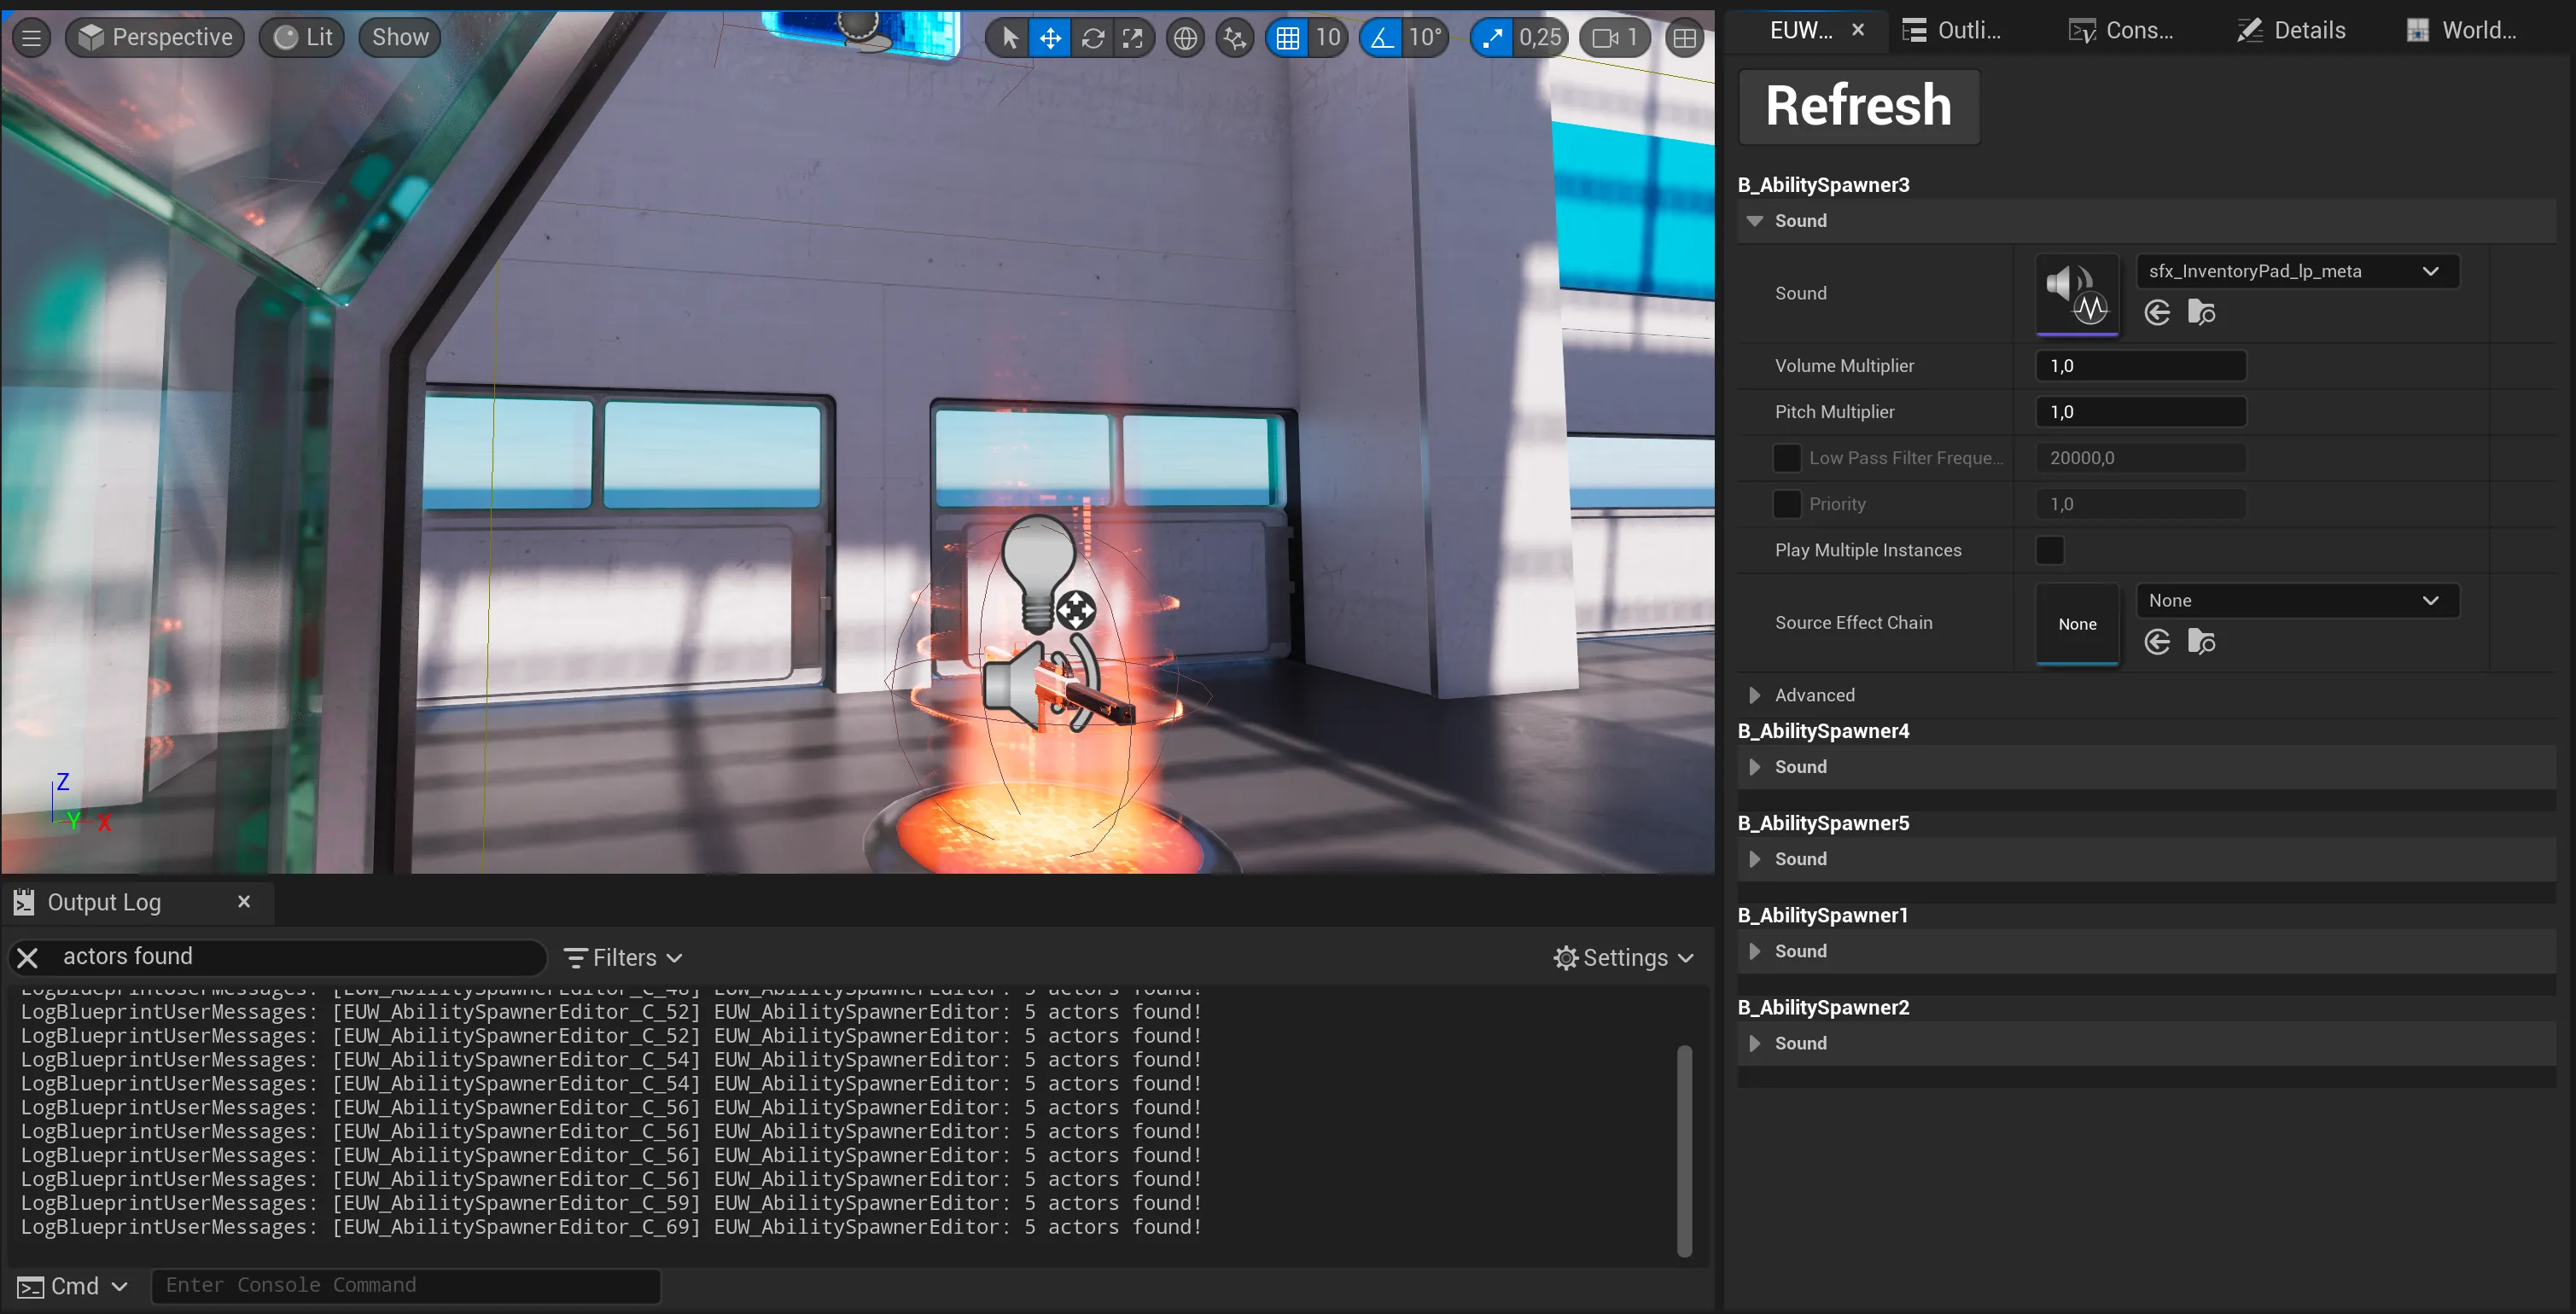
If we press the Refresh button on our EUW now, we should see the AbilitySpawners which are in the level.

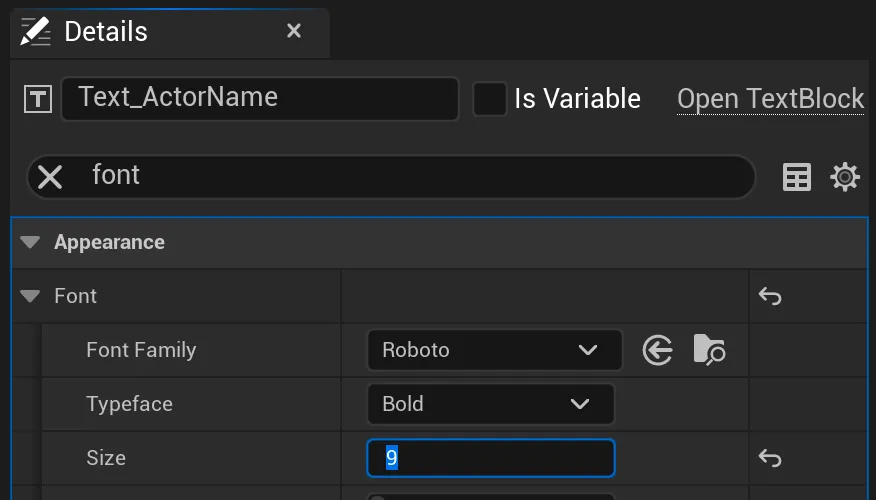
We’re almost done! In the our list view entry widget, change the font size of AudioVolume_Text to sth. less big, ie. 9.0.
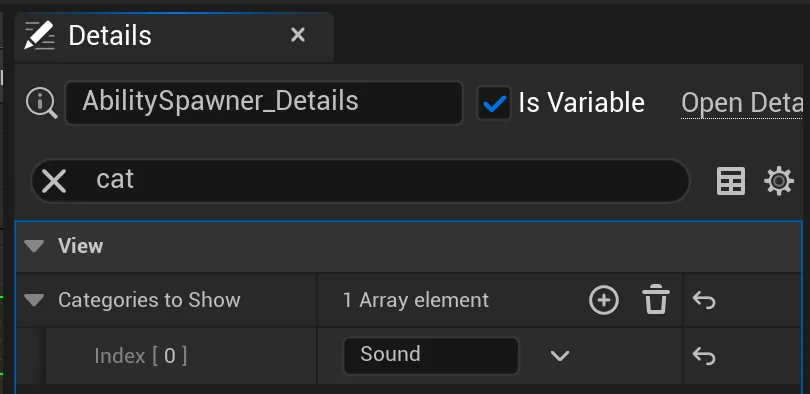
Back in the Designer tab of our entry widget, select the Details View, search for Categories to Show´ and add Sound to this array.
Next we expand the On List Item Object Set event. We try to cast the incoming List Item Object to LyraWeaponSpawner, that’s the class the B_Spawner Actor Blueprints in the level are derived from.
From there we try to get the Audio Componentand use that with Set Object on the Details View.
Note: If we want we can add some error handling here, but for the purpose of this tutorial I’ll leave this up to you.

If we finally re-run our EUW we should get Sound properties from the Audio Components of the B_AbiliySpawner that are present in the level listed in our List View.
This lets us directly edit the properties of these Audio Components without having to navigate to them using the regular Details panel.
It would be cool if we could click the name of the B_AbilitySpanwer in the ListView and the viewport would focus it, so we know where we are in the level.
To do this, we assign an Event to the On Item Clicked delegate in our EUW when we add the B_AbilitySpawner to the ListView.
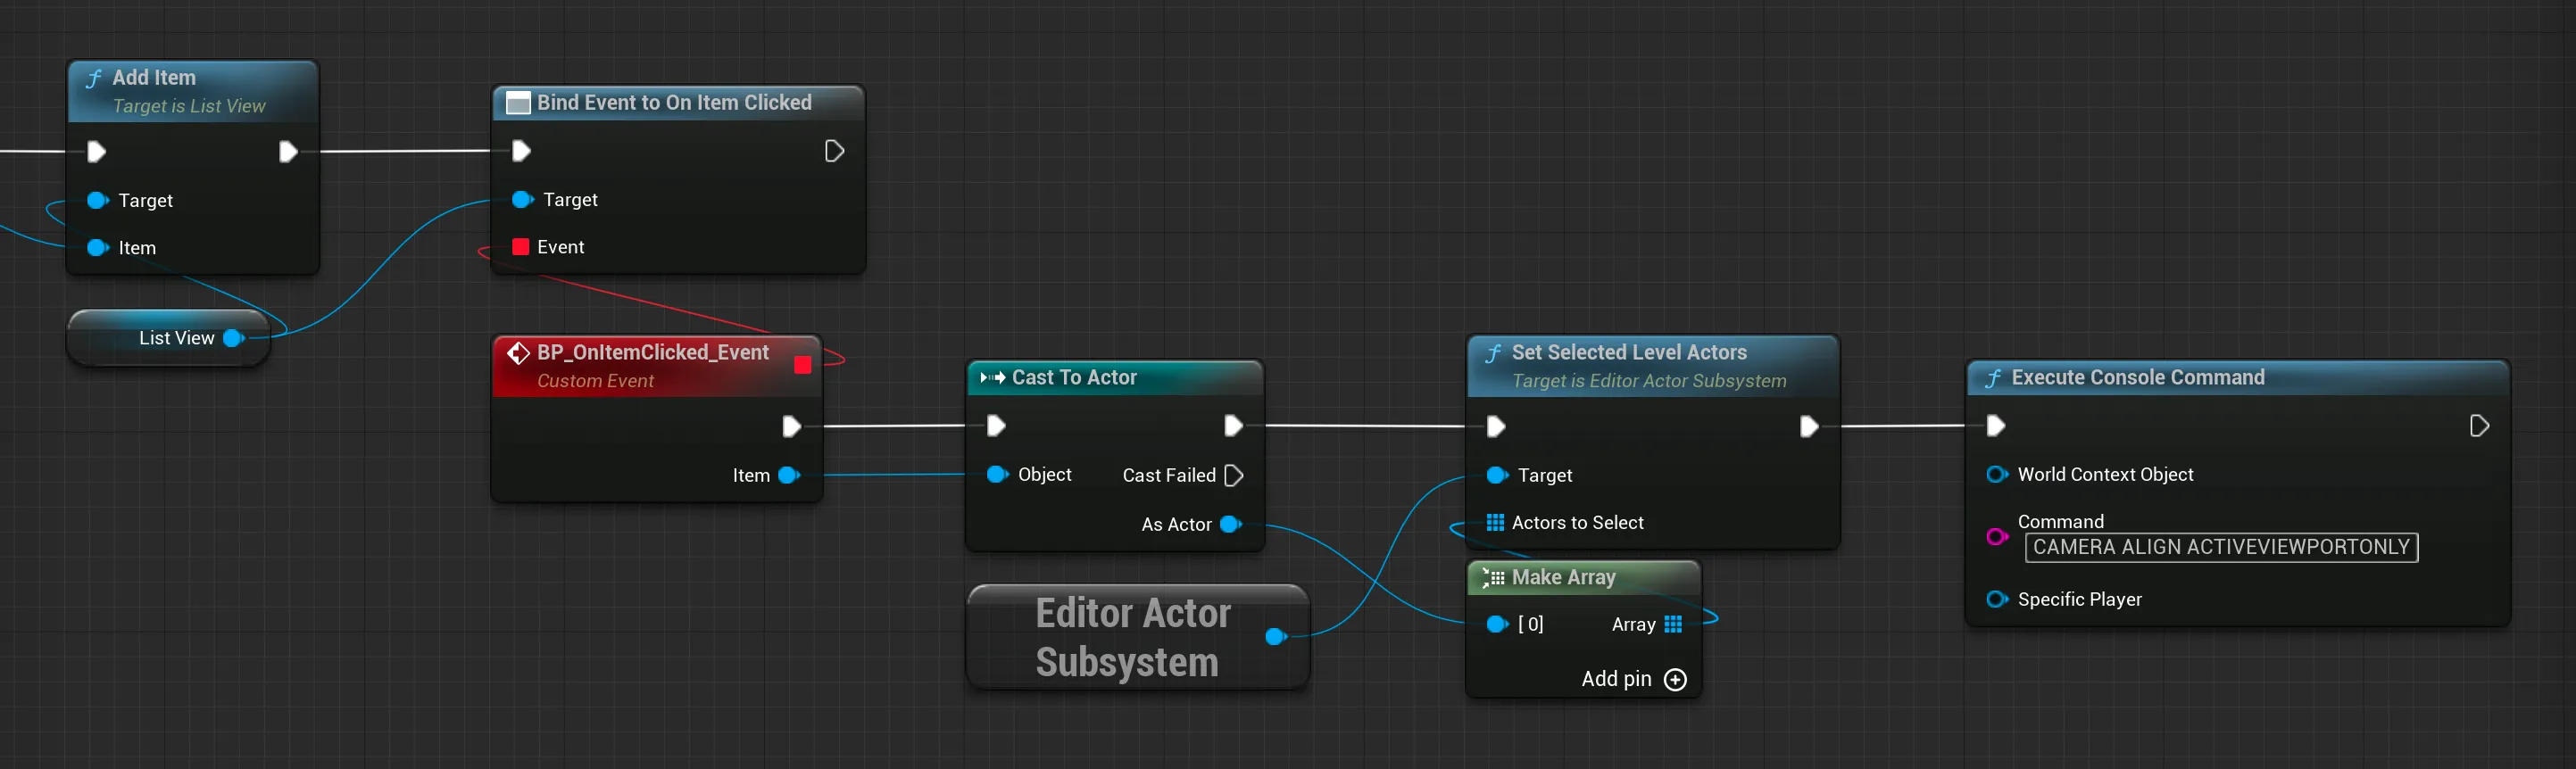
Now when we click on the name of the B_AbilitySpawner in our EUW, the camera will select and focus the actor in the viewport.
And that’s all there is to it.
Note: Of course we could tweak the appearance of our tool a bit by adding some padding between the actor name and the details for instance and adjusting the button font size etc. I’ll leave it up to you.
I hope this should help you get started leveraging editor utility widgets to speed up your and your teams workflows :).